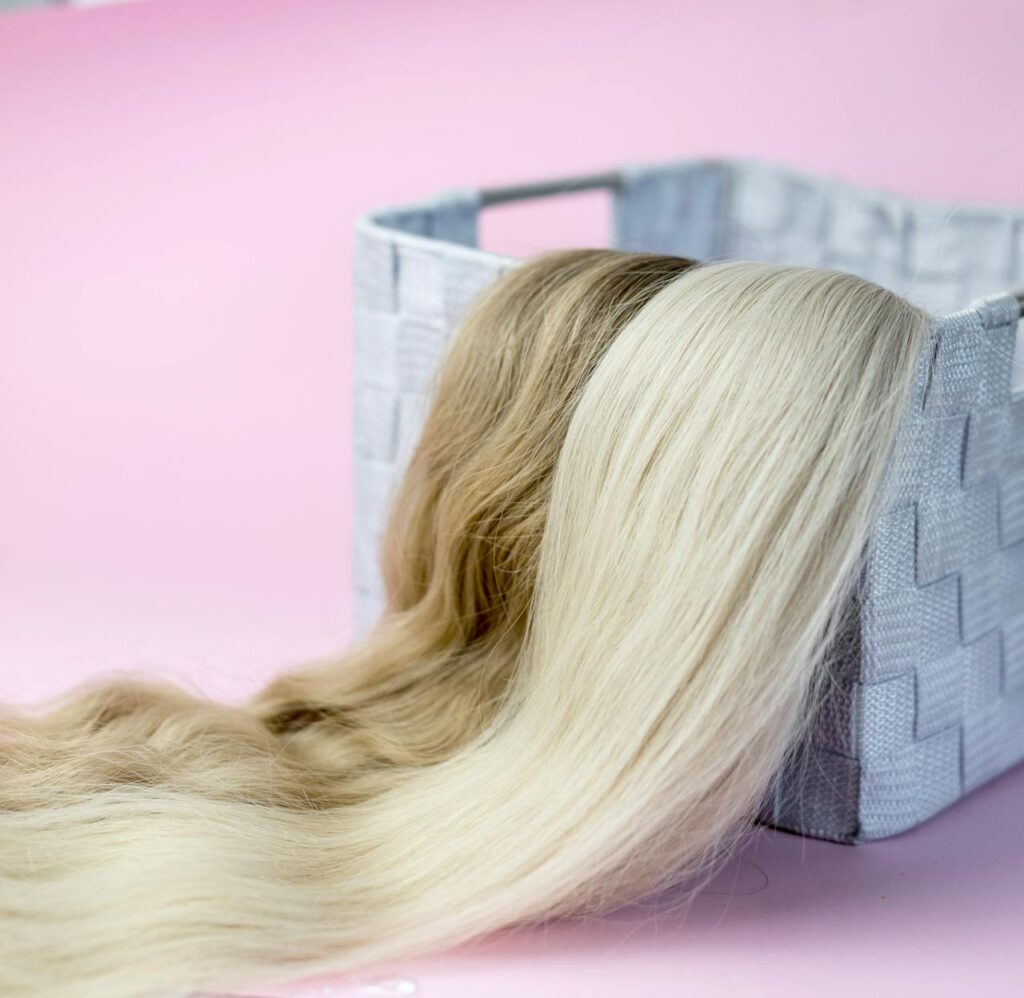
Clip-in extensions are one of the easiest ways to add volume, length, and instant glam but only if they’re blended correctly. When blended well, clip-ins look completely natural, move like your own hair, and stay undetectable even up close.
Whether you’re new to extensions or want to perfect your technique, this guide will teach you how to blend clip-in hair extensions effortlessly. From product recommendations to everyday styling hacks, you’ll learn exactly how to get that flawless, “is-that-your-real-hair?” finish.
Let’s dive into blending secrets used by stylists, beginners, and SUZE WIG customers who want natural results every time.
Why Blending Matters
Even the best-quality clip-ins won’t look natural without proper blending. Because everyone’s natural hair texture, thickness, and cut are different, blending ensures:
- Smooth transitions from your hair to the extensions
- Natural-looking body and movement
- No visible wefts or bumps
- A consistent texture from roots to ends
- More realistic hairstyles in photos and videos
If your goal is to make hair extensions look like your hair, blending is the key.
What Affects How Clip-Ins Blend
Before jumping into the tips, it helps to understand what influences how seamlessly extensions blend with your natural hair.
1. Texture Match
The texture of your natural hair and the texture of the clip-ins must be similar.
SUZE WIG’s Big Waves and Blunt Cut styles make blending easier because they mimic real movement using high-grade synthetic fibers.
2. Hair Length
The shorter your natural hair, the more strategic your blending must be.
Shoulder-length or longer blends most seamlessly.
3. Hair Thickness
Thin hair requires lightweight placement, while thick hair needs more sectioning.
4. Placement
Where and how you clip the pieces affects how natural everything looks.
5. Styling
Heat, curl patterns, and finishing touches all help the extensions blend naturally.
How to Blend Clip-In Hair Extensions: Step-by-Step
These are the blending techniques that make the biggest difference, even for beginners.
1. Section Like a Pro
Blending starts with proper sectioning. Here’s the ideal placement:
Bottom Section:
Start at the nape and work upward in horizontal layers.
Middle Section:
Add the main wefts where your head has the most volume.
Crown Section:
Leave enough natural hair on top to cover the clips fully.
Pro Tip:
Always keep the top-most section thicker, this guarantees invisibility.
2. Use a U-Shaped Clip-In for Instant Blending
SUZE WIG’s U-shaped clip-in design is extremely beginner-friendly.
It follows the natural curve of the head, making blending smoother and faster.
Why it blends better:
- Even weight distribution
- No bulky stacking of multiple wefts
- Natural crown coverage
- Fewer pieces = fewer blending mistakes
This is ideal if your biggest concern is keeping your clip-ins hidden.
3. Tease the Roots for Grip & Volume
If your hair is silky or fine, clip-ins may slip or sit too flat.
To fix this, just:
- Part a small section
- Backcomb or tease the roots
- Spray a light texturizing mist
- Clip the extension onto the teased base
This gives your hair structure, helping it grip the clip and blend better.
4. Mix Layers of Your Hair With the Clip-Ins
To avoid a stark line between your hair and the clip-ins, alternate your natural hair with the extension layers.
Example:
- One weft
- A thin layer of your hair
- Another weft
- A thicker layer of your hair on top
This creates a soft, layered blend from top to bottom.
5. Add Curls or Waves for Seamless Movement
One of the easiest ways to blend extensions is by curling or waving your hair together with the clip-ins.
Because SUZE WIG uses high-grade synthetic fibers, the style holds beautifully with minimal refreshing.
Why curls help blending:
- Softens the transition line
- Hides different lengths
- Adds volume around the extension base
- Camouflages texture or color differences
Blending tip:
Wrap your natural hair and the extension hair around the curling wand together for the most natural finish.
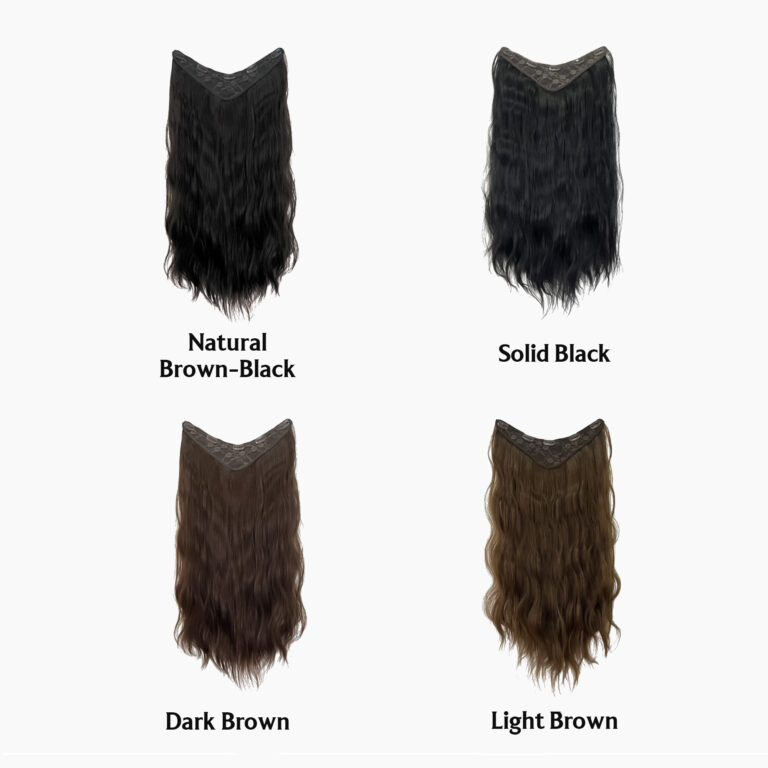
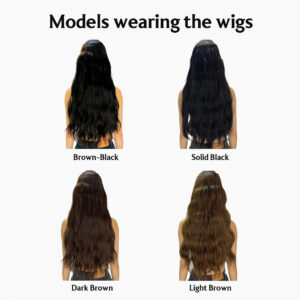
6. Choose the Right Texture for Your Natural Hair
Texture matching makes blending effortless.
SUZE WIG offers textures designed for everyday glam, including:
Big Waves – great for:
- Volume lovers
- Soft, romantic glam
- Thick hydration-like movement
Blunt Cut – great for:
- Straight everyday styles
- Sleek looks
- Sharp, modern glam
Matching the texture to your natural hair (or your desired daily style) creates a cohesive, seamless effect.
7. Blend Using Heat (If Heat-Friendly)
Some synthetic fibers from SUZE WIG are heat-friendly within safe temperature limits.
Always check the product instructions.
How heat helps blending:
- Creates uniform texture
- Removes unnatural bumps
- Adds volume
- Smooths frizz where your real hair meets the extensions
Use gentle heat for best results and longevity.
8. Hide Short Hair Using the “Tuck & Pin” Method
If you have short layers that stick out, use this stylist trick:
Steps:
- Gather the short hairs at the nape
- Twist them into a small flat bun
- Pin them securely
- Clip the bottom weft over the pinned section
This technique instantly hides choppy or awkward layers.
9. Blend With Styling Products
Products make blending easier and extensions more natural-looking.
Recommended products:
- Lightweight leave-in conditioner
- Fiber-safe shine mist
- Texture spray
- Anti-frizz serum
Avoid heavy oils – they don’t absorb into synthetic fibers and may make extensions stiff.
10. Brush With the Right Tools
Use:
- A wide-tooth comb
- A soft-bristle brush
- A loop brush (best for synthetic fibers)
Brush downward and gently to maintain fiber quality.
How to Blend Based on Your Hair Type
Different hair types have unique blending needs. Here’s how to adapt your technique.
Fine or Thin Hair
Thin hair often struggles with clip-ins because the wefts can show through.
Blending tips for thin hair:
- Stick to lightweight clip-ins
- Tease the roots before clipping
- Use U-shaped extensions for easier coverage
- Add curls or waves for extra blending
Best SUZE WIG pick: U-Shaped Everyday Clip-Ins
Medium Hair
This hair type is the easiest to blend.
Blending tips for medium hair:
- Use the Big Waves or Blunt Cut texture
- Apply wefts evenly across the head
- Add soft styling for a polished look
Best SUZE WIG pick: Big Waves Clip-Ins
Thick Hair
Thick hair sometimes needs more layering for smooth blending.
Blending tips for thick hair:
- Install wefts slightly higher
- Section the hair in thinner layers
- Straighten or wave the hair together with the extensions
Best SUZE WIG pick: Blunt Cut Clip-Ins
Curly or Textured Hair
Curly hair blends beautifully when matched to the right wave pattern.
Blending tips for curly hair:
- Curl your natural hair first
- Use setting mousse for definition
- Finger-comb curls instead of brushing
Best SUZE WIG pick: Big Waves Clip-Ins
Best SUZE WIG Products for Seamless Blending
1. U-Shaped Clip-In Extensions (170–200g)
Perfect for beginners and thin hair.
Natural movement. Quick blending.
2. Big Waves Clip-In Extensions
Adds full, bouncy, everyday glam.
Ideal for wavy or curled styling.
3. Blunt Cut Clip-In Extensions
Sleek, polished, straight styles.
Perfect for modern everyday glam.
Final Styling Hacks for a 100% Natural Look
Use these finishing touches for the most seamless blend:
- Use dry shampoo on the extension roots to reduce shine
- Add layers by trimming the ends (professional recommended)
- Blend face-framing pieces with a small curling wand
- Match color to your mid-lengths, not roots
- Keep scalp clean and texturized for grip
- Always leave enough natural hair at the top
When done correctly, clip-ins become completely undetectable.
Final Thoughts
So do clip-ins look natural?
Yes, absolutely. With the right techniques, texture match, and styling tricks, clip-in extensions blend seamlessly into your real hair.
Whether you want soft waves, sleek straight volume, or an everyday glam transformation, SUZE WIG clip-ins offer natural-looking movement using high-grade synthetic fibers that mimic real hair perfectly.
Blending doesn’t have to be difficult, you just need the right steps and the right products.